Selecting a rifle for any of the various disciplines of metallic silhouette can be quite a challenge. While there are certain brands and models that are typically gravitated towards for their ability to meet the basic criteria for the sport, the award for “most open-ended and least-restrictive criteria” probably goes to the Open air rifle.
According to the NRA Silhouette rulebook, an Open air rifle can weigh no more than 16 pounds, must be 40” in length or less, and may not have a hooked butt-plate. That’s pretty much it. With so few restrictions on what rifle you can use it opens up a dizzying amount of options for what rifles might be considered.
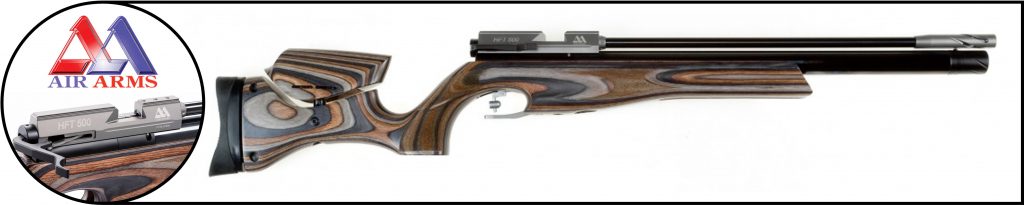
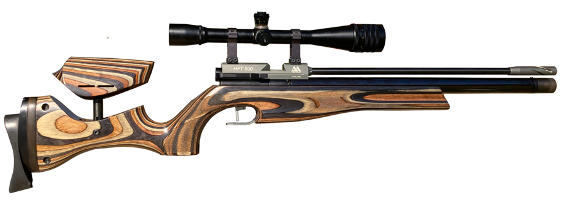
For my own purposes I chose the Air Arms HFT-500 as the basis for my Open air rifle. But why I chose that particular model, and what modifications I have done to it to fit my preferences, is the greater story I wish to share. Keep in mind that my preferences, priorities, and decisions may be vastly different from yours, but my hope is that by explaining my journey and thought-processes I will shed some insight on how you may go about selecting your next silhouette rifle, whatever discipline it may be for.
Starting Points
When I first started looking for what might be a good candidate for an Open air rifle, I looked to my three other silhouette rifles to see what attributes I would be keeping in mind. First, my smallbore rifle is a Pharr/McDonald stocked Anschutz 1710 (in the Hunter rifle configuration). Secondly, I have an Anschutz 2002 SuperAir SSP for my Target (10 meter) air rifle and an Air Arms TX200 for my Sporter (spring-piston) air rifle.
The Anschutz 2002 was the best ergonomic fit out of the three, with an adjustable butt-pad and cheek riser as well as a deep fore-end and a fantastic trigger. I would be looking to retain these attributes as much as possible.
The TX200 is designed as a “sporting rifle” so it does not have an adjustable butt-pad or cheek riser, but there was something about the grip angle that fit me better than any of my other rifles.
Both of these rifles (with scopes) are right around 11 pounds which I greatly prefer over the 8.5 pound limit of a smallbore Hunter rifle. A good Open rifle candidate would need to be close to this 11 pound weight.
While my 1710 is a repeater I always shoot it with a single-shot adapter and my two air rifles are single shot as well, so a single-shot rifle would be preferable, although if the right rifle was a repeater it would still be acceptable, just not a necessary feature for me.
Finally, there are the common attributes that most people look for in any competition rifle such as a decent trigger (or at least one that can be improved); a lack of difficulties mounting a scope or having the scope block the loading port; excellent accuracy; and a reputation for good reliability. These would all be on my list as I began the search for a new rifle.
Keeping Eyes Open
I delved into various online air rifle forums and browsed manufacturers websites to get a feel for what was out there. There were plenty of rifles that had some of the attributes I was looking for but not necessarily all of them or even a majority of them. Likewise, there were some Field Target rifles by the likes of Steyr, Feinwerkbau, Anschutz, and others that seemed like perfect candidates and that checked all the boxes but were in the $3,000 to $5,000 range… a bit too much for what I was willing to pay at the time.
Then I stumbled upon the Air Arms HFT-500. It had many of the things I was looking for including excellent reviews, all the ergonomic attributes I had in mind, and a price-point I could accept at around $1,300 new.
The few things that were working against it were the slightly lower-than-desired power level set at just under 12 ft/lbs for the UK market (although adjustable with some tweaking); and a factory weight of only 8.2 pounds. I hoped that with a little ingenuity and work on my part I would be able to bring this rifle up to an excellent option for myself, and if not, I could always sell it off and try again with another model.
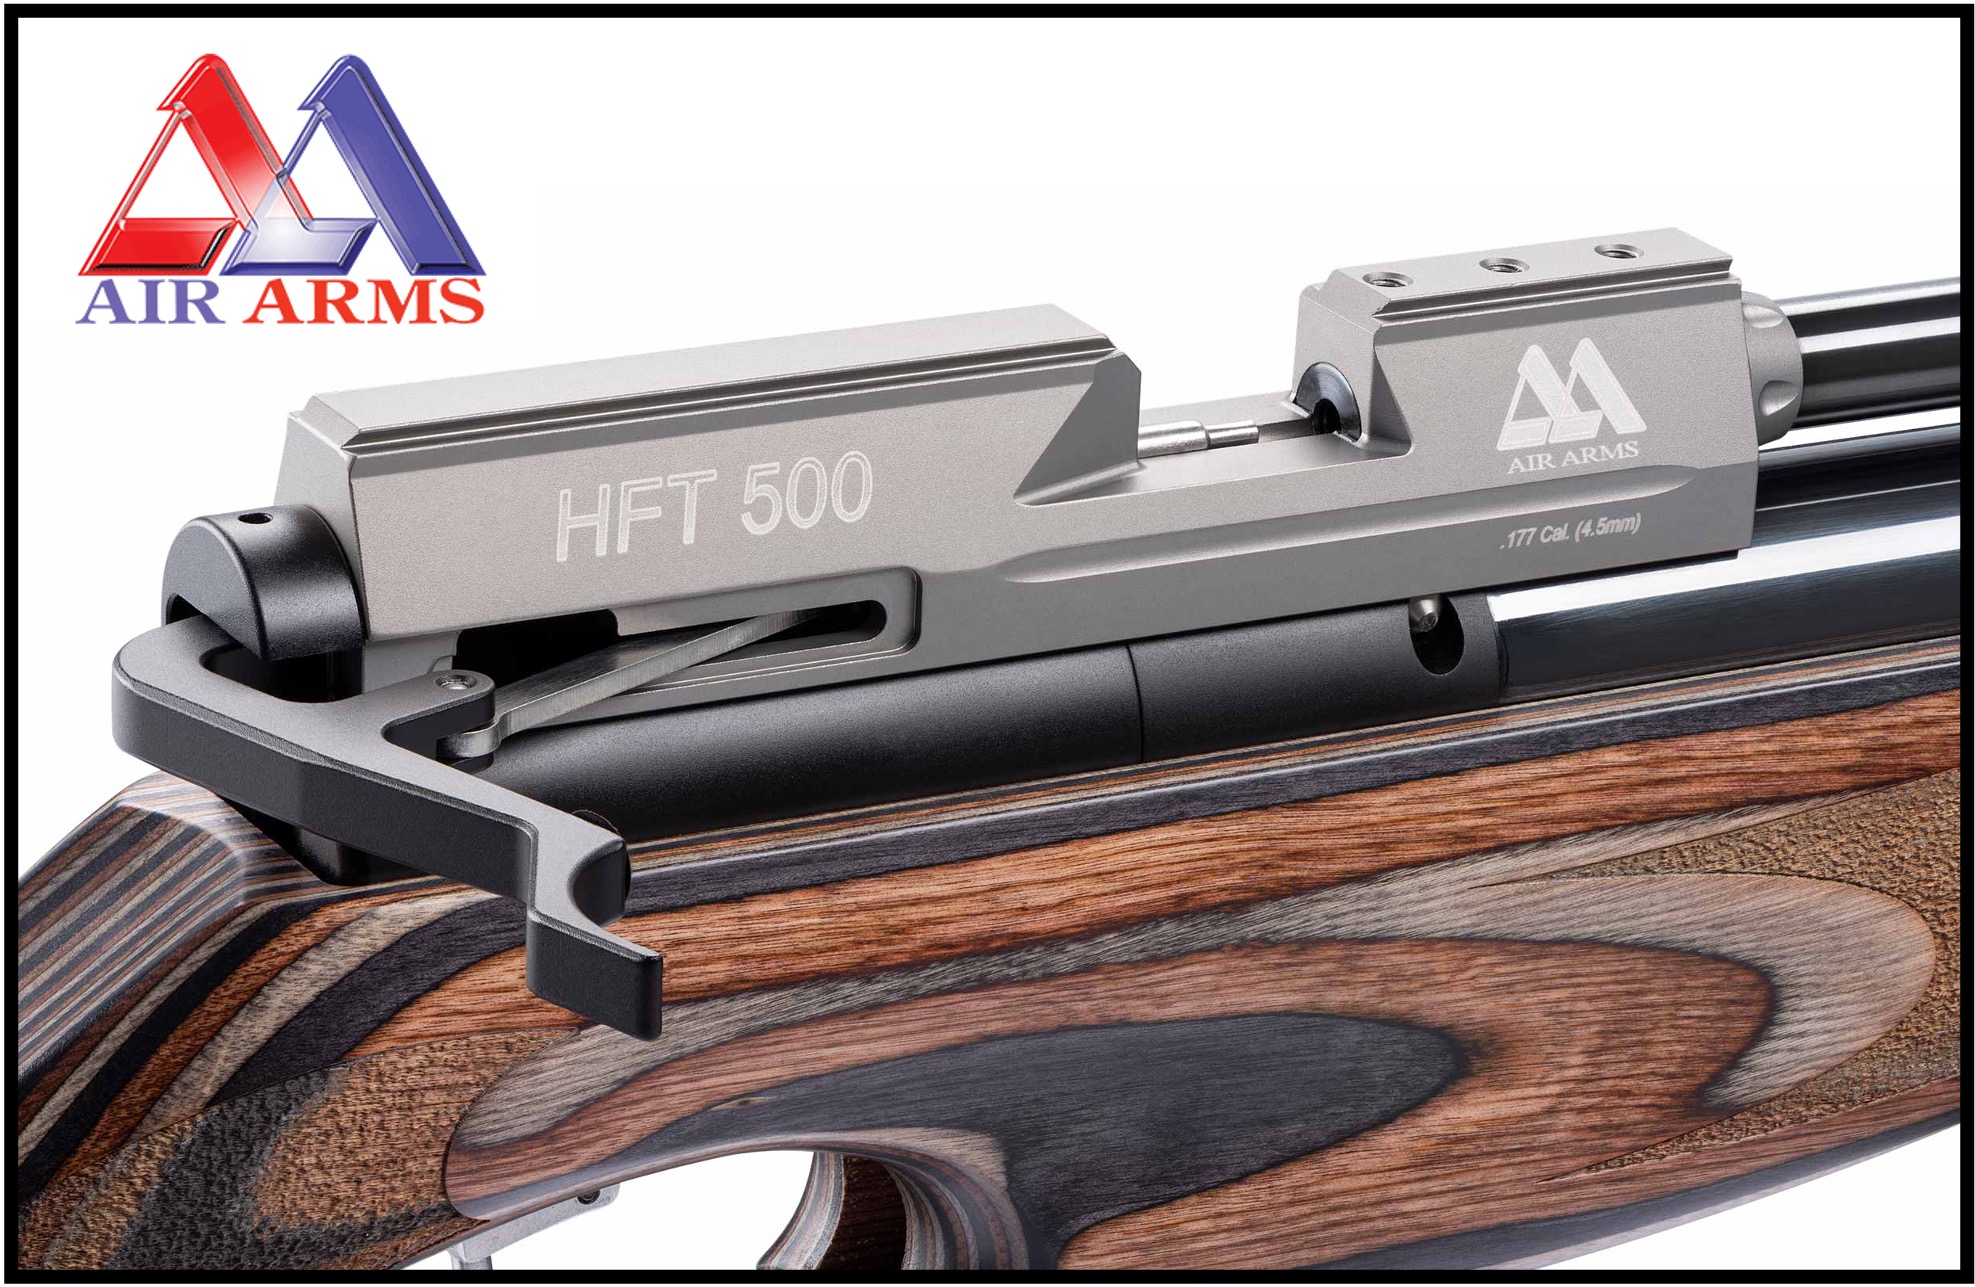
The HFT-500
First, some basic specifications for the rifle. It was designed by Air Arms to meet the specifications of Hunter Field Target (thus the HFT in the name) which is a version of Field Target found primarily in the UK. Hunter Field Target rules limit the power of the rifles to 12 foot-pounds and a maximum scope magnification of 12X. HFT targets are set at various distances out to 45 yards, the same distance as the farthest targets in air rifle silhouette.
The rifle was designed with an ambidextrous stock, which may seem like a compromise to some, but with the adjustable cheek riser and the design of the grip angle it fits me beautifully. In fact, one of the reasons I was drawn to the HFT-500 was because the grip angle closely resembles that of the TX200, which I find is most comfortable for me.

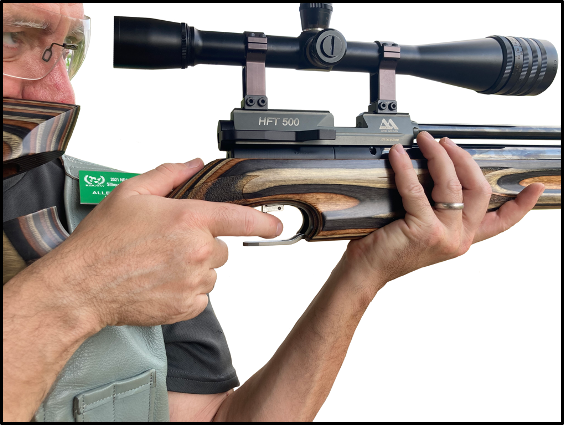
I like to use a “thumbs up” grip with my thumb running directly in line with the main axis of the rifle rather than wrapping it around the side in a “hammer grip”. The HFT-500 stock has a shallow dished-out spot directly behind the end of the receiver which my thumb settles into nicely for repeatable indexing of my trigger hand.
The deep belly of the fore-end allows me to hold the rifle with the open palm of my support hand, thus transferring the weight of the rifle from the heel of my palm through my arm bones, into my hip, and over the forward leg.
The HFT-500 has a two-stage trigger, and while it isn’t nearly as good as the one in the Anschutz 2002, I knew from my research that with a little bit of work it could be improved and quite serviceable. From the factory it comes with an adjustable “button” style trigger shoe, but after a bit of experimenting I have settled on using the vertical bar itself as the trigger blade.
The Modifications Begin
All my other rifles have a length-of-pull of 14.5”, so I knew that no matter what rifle I would buy I would have to add a spacer between the stock and the butt-pad to achieve the proper LOP. I have added a 1/2” a spacer to the HFT-500, but I’ll expand upon that later.
The trigger was one of the first items to receive attention. The clockworks of the trigger assembly isn’t too complicated, so the first order of business was to inspect and polish the sides of all the internal parts as well as the mating surfaces of the housing side-plates. Some light buffing with 2,000 grit sandpaper polished them up real quick. The matting surfaces between the sears were inspected and carefully touched up being careful not to round over the crisp edges. Some judicious lubrication on the pivot pins and adjustment to the trigger weight, take-up, etc., and it was much better.
Adding Weight
Even after mounting a scope I knew I wanted to add some weight to the rifle to get it closer to the 11 pound weight of my other two air rifles. Luckily for me I have a friend who has a personal machine shop and he has been teaching me some basic machining skills. I took full advantage of that situation when it came to contemplating potential replacement parts for the rifle.
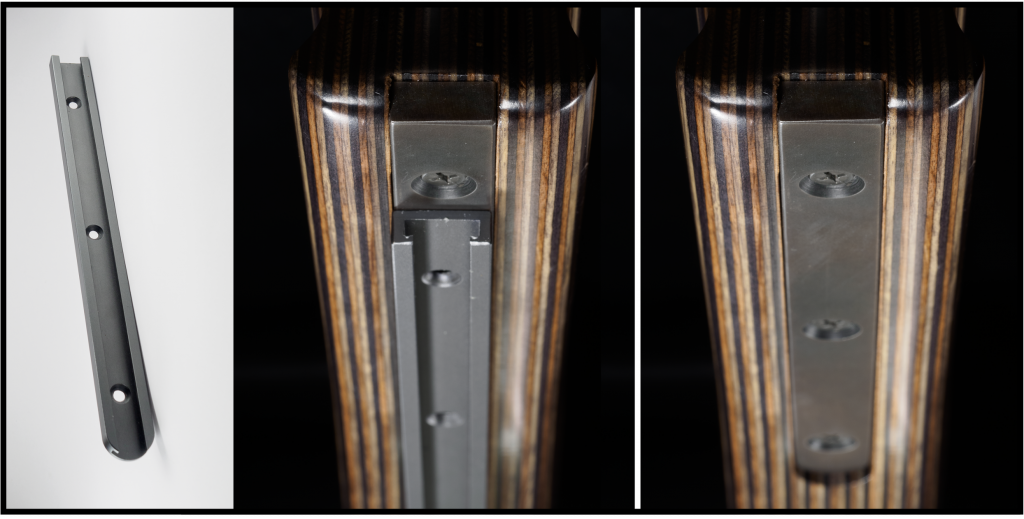
The first place I thought would be a good candidate for adding weight was the accessory rail in the fore-end. I had my friend make a replacement using a solid bar of steel that would fit in the stock in place of the thin aluminum rail. The steel part added 7 ounces of weight in place of the aluminum rail that weighed just a single ounce.
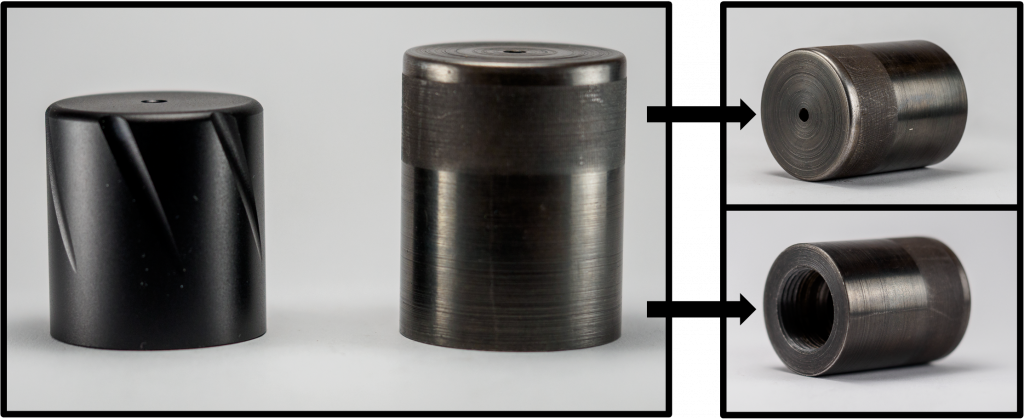
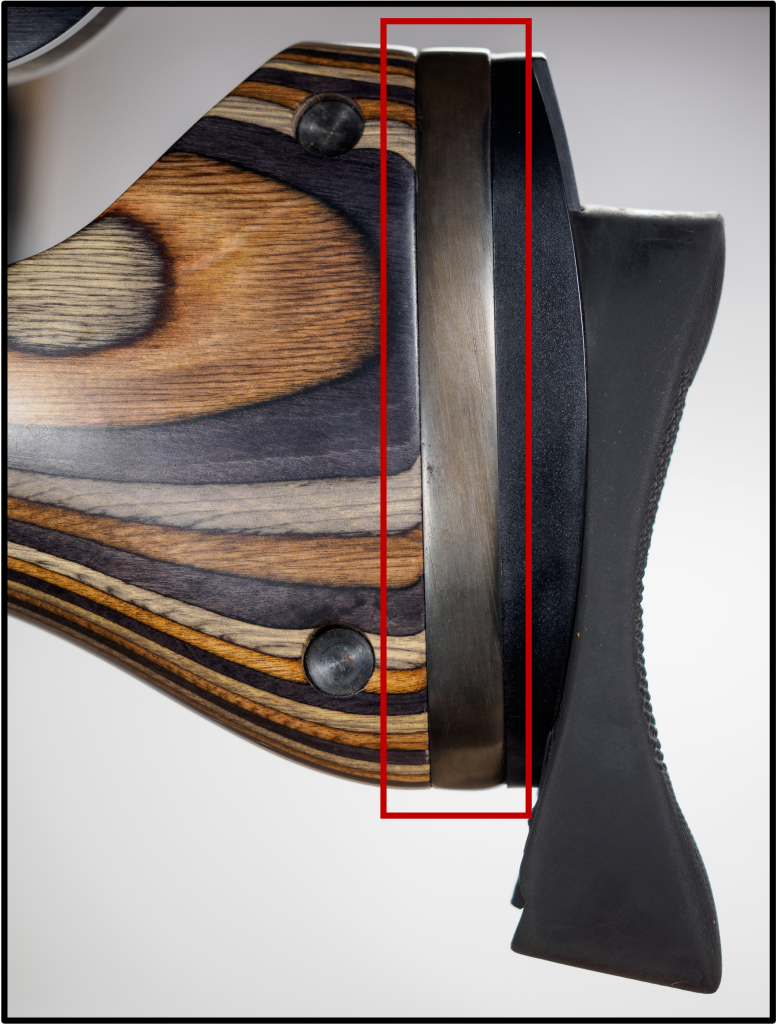
The second piece that was up for replacement was the end-cap which protects the fill fitting at the end of the air cylinder. The factory screw-on cap that sits just under the muzzle weighs in at a dainty 1.5 ounces but the steel replacement that I made is just over 7 ounces. That’s a considerable amount of weight added way out there at the muzzle, which I find contributes a significant amount of inertia to help slow down the wobbles of offhand shooting.
The third major addition of weight came in the form of the spacer between the butt-pad and the stock in order to get to the right LOP. Since I needed a 1/2” of additional length I used a 1/2” thick piece of steel plate which I cut, filed, and sanded to the same profile as the stock. This not only added the length I needed to get the desired LOP but also added just under a pound of weight to the back end of the rifle. A good balance for the weight I had already added to the front.
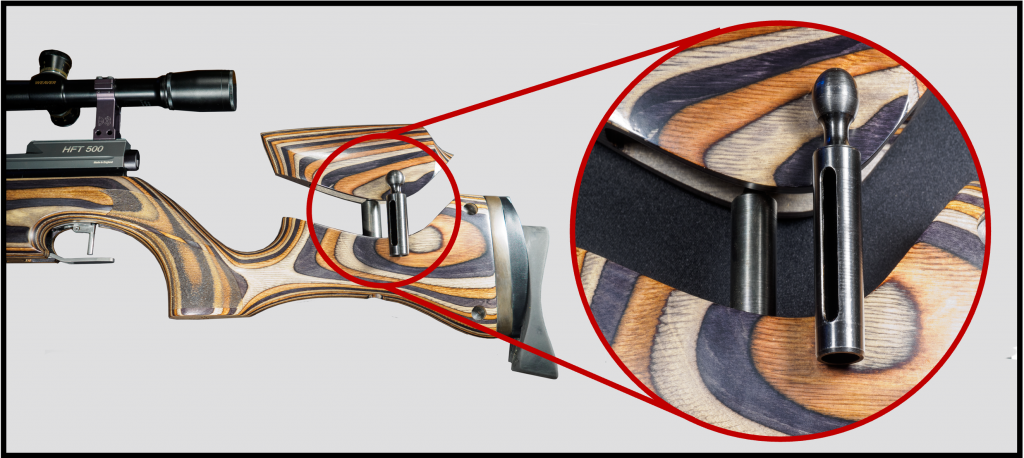
The last addition to the parts replacement was to make a taller center post for the cheek riser. This was a fun one to make because the top end of the post is a sphere that allows the cheek piece to tilt and pivot. The original part was also steel, just a bit shorter than the new one, so the replacement only added an ounce or two of weight. However, the extra height allows me to have a nice cheek-weld while still keeping my head in an upright position.
After all of these additions the rifle weighs in at 11 pounds 2 ounces with a Weaver T-24 scope and D3 Precision tall rings. The balance point of the rifle is at the front of the receiver and in line with the front scope ring, right where my support hand would be. Ergonomically and weight-wise this rifle feels great to me in its current form.
Learning Curves & Power Curves
When it comes to the power-plant of the rifle I knew I would need to do some testing, adjusting, investigating, and learning in order to get it to shoot to its best abilities.
One of the first steps would be to do some pellet testing to discover what weight and brand pellets it liked and to see how many shots I could expect to get out of a fill of the air reservoir.
As it comes from the factory, the HFT-500 is set to shoot just under 12 foot/pounds, or around 800 fps with an 8.4 grain pellet. I was hoping it would like heavier pellets but I would go with whatever pellet it liked best.
The second thing I would have to learn about was the specific “power curve” of this rifle. One of the cost-savings for the HFT-500 versus other higher-end air rifles was to design it without a regulator. From a practical standpoint, what that means is that the first shots after a full fill-up will be lower than the eventual highest velocity. As the pressure of the air cylinder lowers and comes into balance with the spring pressure of the firing valve the pellet velocity increases until it hits a “sweet spot” at which it will be its most consistent. Eventually the velocity will fall off as any other PCP will do when it runs low on air pressure. This is what is known as the power curve of the rifle and can be quite a moving target when adjusting the power settings of the rifle.
When I got my HFT-500 it wasn’t brand new, but slightly used. The previous owner had tinkered with the speed adjustment to try to get the most consistent power curve he could get over the course of a full fill. When I ran a full string of 100+ shots of 8.4 pellets over a chronograph the first 10 shots were running around 720 fps. By shot #40 it was up to 735 fps where it stayed through shot #75, after which it slowly declined again and by shot #100 it was back to 720 fps with the velocity falling fast thereafter. Basically a 15 fps spread over the course of a full fill and 100+ shots. Pretty good consistency, but not quite the velocity I was hoping for from an Open air rifle.

I knew I wanted a bit more velocity in order to hit the Rams at 45 yards, so I cranked up the speed to around 800 fps with about 140 bar in the reservoir (about the middle of the air cylinder’s usable range).
What I discovered is that the first shots after a full fill (190 bar) were running about 755 fps and the velocity steadily increased to around 795 fps when the pressure was at 140 bar (about shot number 60). It stayed at that velocity for another 35 shots or so (around 110 bar) and then velocities dropped pretty quickly as expected. By increasing the power adjustment I had also increased the spread of the power curve! For the same number of shots the velocity spread was now over 40 fps from the previous 15 fps.
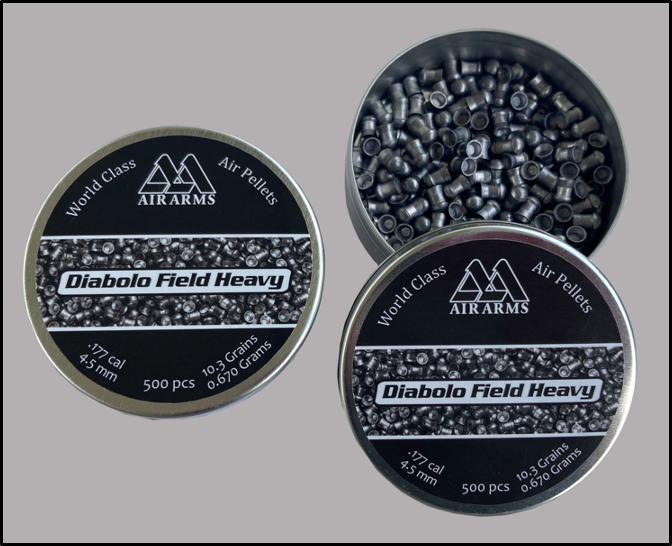
“After continued research, tinkering with the power adjustment, modifying the striker spring force, and lots of extended chronograph testing, I now have it running so an initial fill pressure of 180 bar will shoot 10.3 grain pellets (its favorite pellet weight) at a starting velocity of 765 fps and raising to 775 fps (only 10 fps difference) around shot #40. In 40 more shots it will come back down to 765 fps all while staying within a 5 fps deviation. While it may not be running at my desired velocity (800 fps or better) I am quite pleased with the overall performance where it really counts… the group sizes down range.”
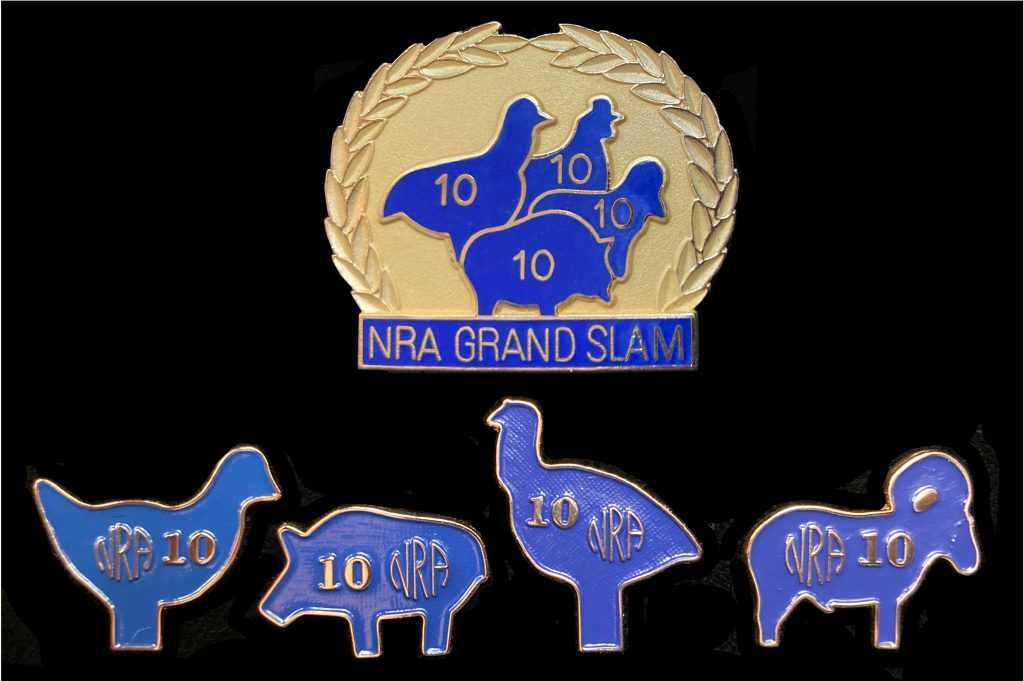
I’m proud to report that this rifle has help me to accomplish my very first Grand Slam. It’s my favorite air rifle to shoot, not because it’s perfect (trust me, I know it’s not), but because it’s the best fitting rifle I’ve got and it helps me get the best scores I can muster.
Conclusions
If you expect the perfect rifle to come right off the rack and be your ultimate shooting tool you will probably be disappointed for the majority of your life. Also, you don’t have to be a master gunsmith in order to see a rifle as not just a static design, but rather as a starting point for adjustments and modification in order to fit it to you and your shooting style. By the same token you don’t have to buy into a fully customized, one-of-a-kind rifle to achieve the same results.
When shopping for your next silhouette rifle, think about what attributes are important to you and what elements of other rifle designs you find desirable. Look for as many of those attributes as you can find in a single rifle and go from there. You might be amazed how much a little work on your part could yield such a satisfying result.
I would like to thank Rene Magdaleno for helping out with the images.